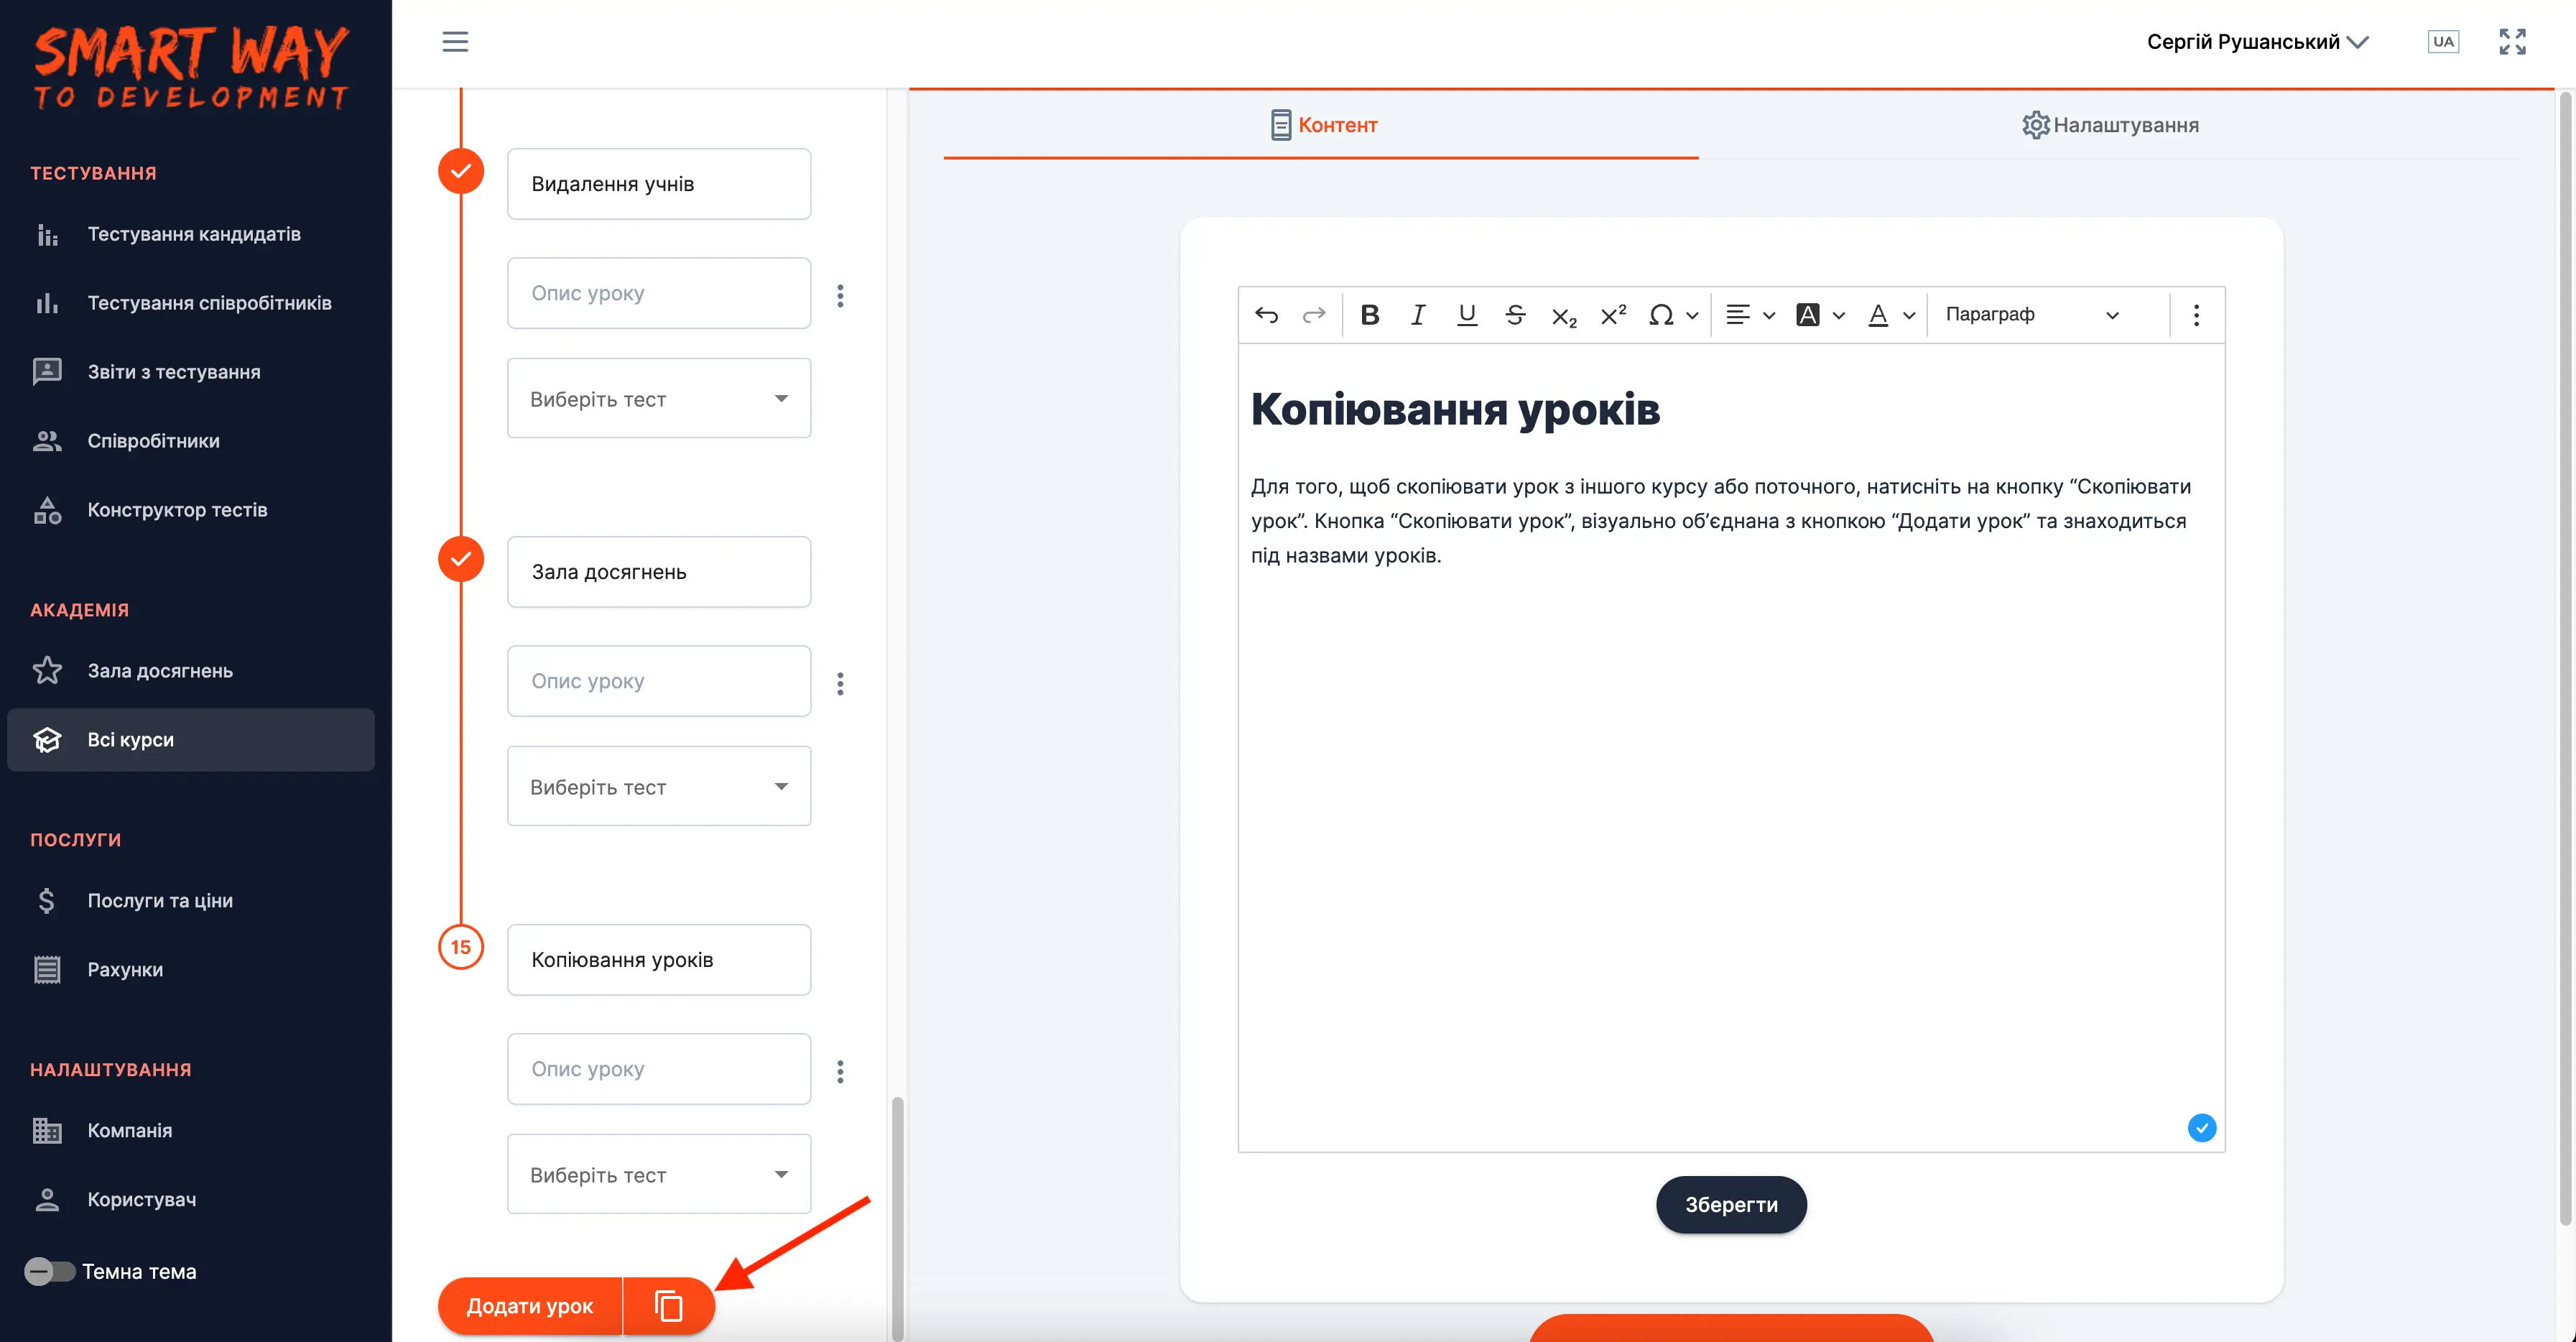
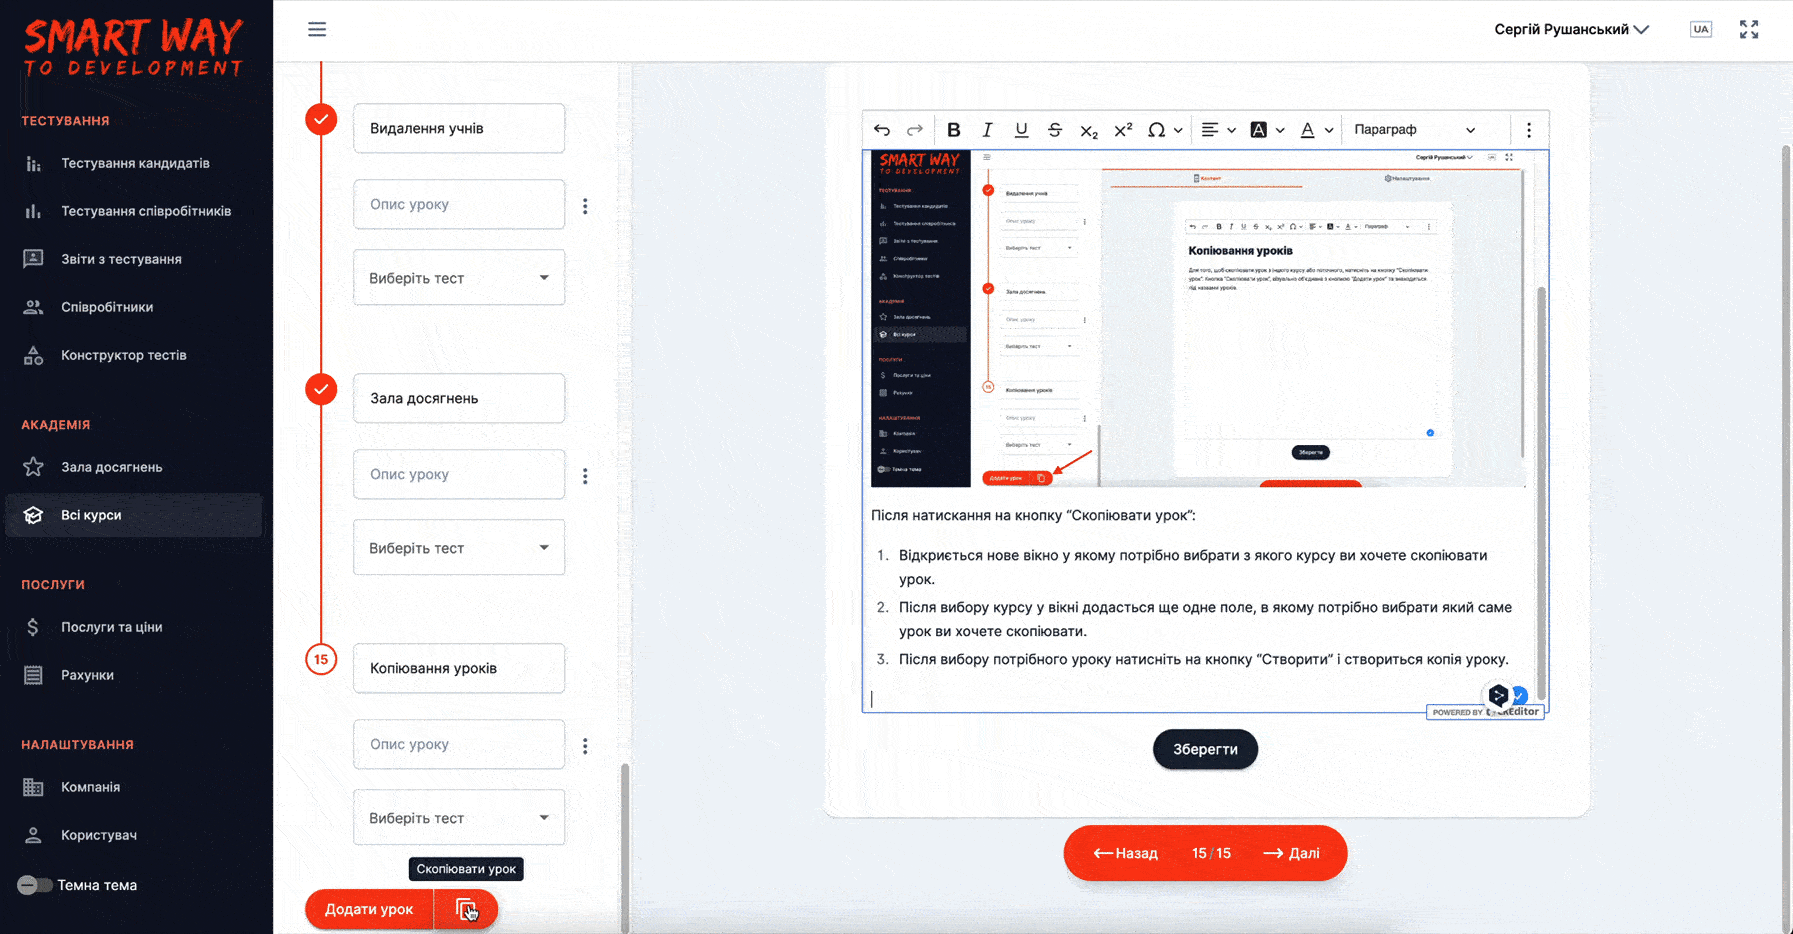
To copy a lesson from another course or the current one, click the Copy Lesson button. The Copy Lesson button is visually grouped with the Add Lesson button and is located beneath the lesson titles.
Once you click the Copy Lesson button:
-
A new window will open where you need to select which course you want to copy the lesson from.
-
After selecting the course, another field will appear where you need to select a specific lesson to copy.
-
After that, click the Create button and the lesson will be copied.
Each copy of the lesson has a warning at the top of the editor that says it's a copy. If you change the content of this copy, the changes will also be reflected in all other copies. The warning also lists the courses where all copies of this lesson are located. Usually, when we modify a copy, we want the changes to be automatically applied to the other copies. However, sometimes you may only want to modify a single copy. In this case, you can make that copy a standalone lesson by clicking the Make it a standalone button in the warning window.
If you delete a copy and only one other copy of the lesson remains, that copy will automatically become a standalone lesson. If there are multiple copies, they remain linked together.
The warning that a lesson is a copy is displayed only in the edit mode for administrators. Students do not see this message when they view the lesson.